Adding AI to the Raspberry Pi with the Movidius Neural Compute Stick
In this article I’ll introduce the Movidius NCS, look into some use cases and finally give you some tips to help you quickly get a Deep Learning powered Security Camera up and running in an hour or two!

Other Articles of Interest
Movidius NCS
- Part2 - Using the NCS with the Raspberry Pi Camera Module.
- Part3 - Trying the NCS out with the Raspberry Pi Zero.
Google Coral USB Accelerator
The Movidius Neural Compute Stick
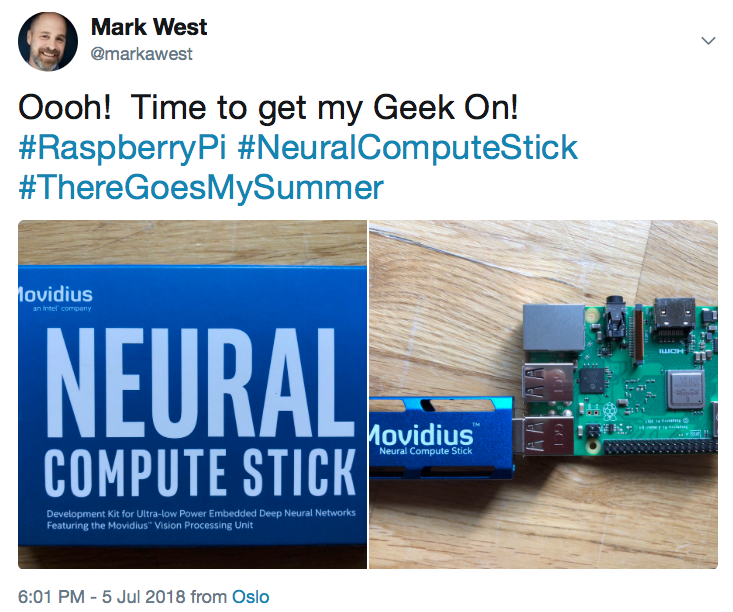
Simply put, the Movidius NCS is a USB stick for speeding up Deep Learning based analysis or “inference” on constrained devices such as the Raspberry Pi. Think of it as an additional CPU for Deep Learning.
Physically the NCS is about 7cm x 3cm x 1.5cm with a USB3 Type A connector. Inside the NCS is a low power high performance Visual Processing Unit (VPU), similar to those used by DJI drones for visual based functionality such as “follow me” modes.
In addition to it's small size, the NCS uses very little power - making it perfect for those battery powered Pi projects. The NCS has been available for the last 12 months and addresses the same use case as the Google Coral USB Accelerator.
I purchased my NCS from RC Components for around 1000 NOK. I received the unit within 2 working days and was eager to get started!
Use Cases for the Movidius NCS
The NCS is designed for image processing using Deep Learning models. Image processing is very resource intensive and often runs slowly on devices such as the Raspberry Pi. Therefore it is tempting to use Cloud API's such as AWS Rekognition for image processing.
With the NCS you can now perform Deep Learning based analysis directly at the Edge / on the Pi. This can save money, bandwidth and power - in addition to potentially decoupling your Edge Device from the internet completely.
A good example use case is my Raspberry Pi based Smart Security Camera project. The existing solution works very well, but has an ongoing cost of around 100-200 NOK a month, mostly due by my use of AWS Rekognition for analyzing images from the Camera. Therefore one of my motives for experimenting with the NCS stems from the possibility to remove AWS from this solution (potentially saving me $$$$)
Other image processing use cases include facial recognition, sentiment analysis, maintenance, monitoring and even checking how tidy your house is!
Using the Movidius NCS
The NCS supports both Caffe and TensorFlow based models.
Using the Movidius NCS is very simple, thanks to a well written SDK. The SDK has two logical components:
- The SDK Tools allows you to convert your trained Deep Learning Model in to a "graph" that the NCS can understand. This would be done as part of the development process.
- The SDK API allows you to work with your graph at run-time - loading your graph onto the NCS and then performing inference on data (i.e. real time image analysis).

Note that the NCS is not used for training models!
Movidius NCS Quick Start
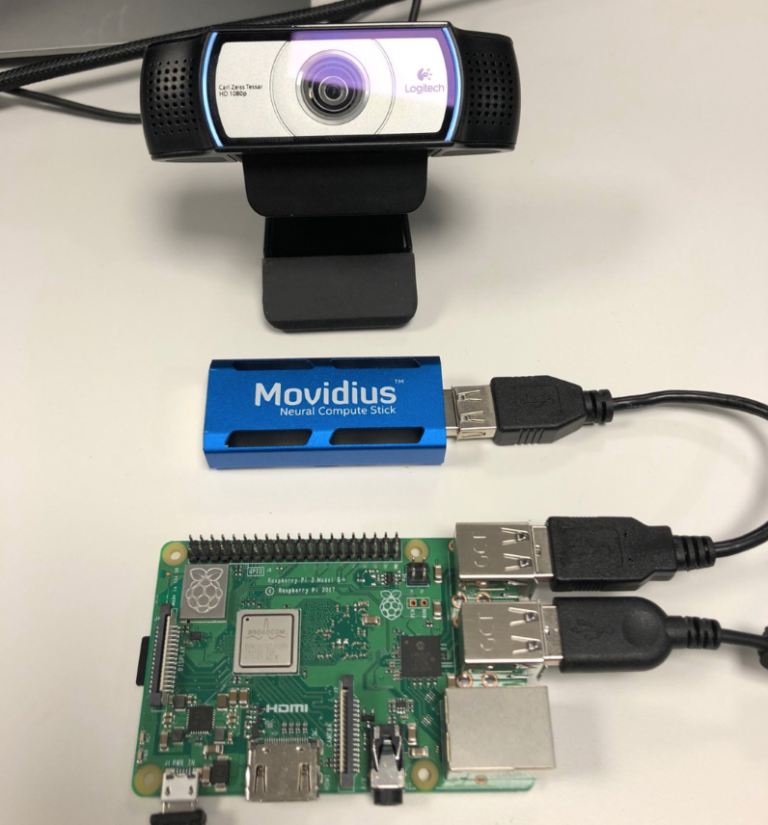
When I received my Movidius NCS I wasted a week getting started with it, despite following Intel’s online documentation to the letter. Waiting hours for software to build and then getting some kind of cryptic error is no fun.
After experimenting I've managed to get the whole process down to an hour or so.
Read on to find out how you can quickly get your new NCS device up and running with a couple of examples from the Movidius App Zoo!
Equipment List
- Preferably a Raspberry Pi 3 B+, along with power cable, keyboard, mouse and monitor.
- An SD Card (at least 16GB) with a fresh installation of Raspbian Stretch.
- A USB Camera.
- A Movidius NCS.
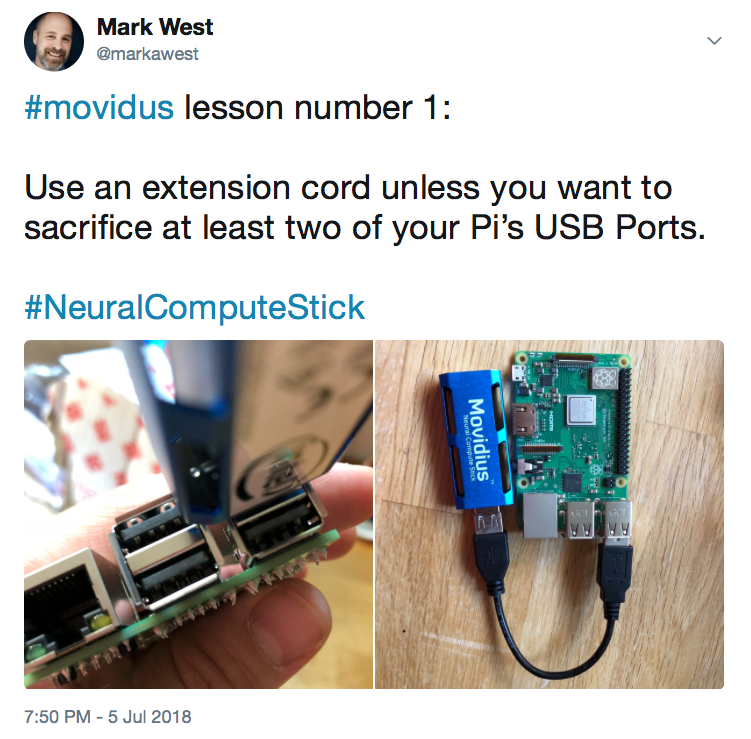
- A USB extension cable.
The USB extension cable is to stop your NCS Device from blocking the other three USB ports.
Task One: Installing the NCS SDK
The two lessons I learned here were:
- Don’t install Version 2x of the API. This failed with a variety of build errors on the Raspberry Pi and led to a lot of frustration on my part. In addition many of the examples only work with Version 1. This situation will most probably improve over time as Version 2 becomes more established.
- Don’t install the full version of the SDK on the Raspberry Pi (i.e. both Tools and API). Installing the API only version will allow you to perform run-time inference. Development (building graphs from your Deep Learning Models) is best done on a more powerful machine. Most importantly, the API only installation is much faster on the Pi.
Install and verify the API only version of the SDK by following the instructions at https://movidius.github.io/blog/ncs-apps-on-rpi. Do everything up to the bonus step (i.e. your last step should be running
python3 hello_ncs.pyto validate that your Movidius NCS is working OK). Depending on your network speed and SD card this process can take less than 30 minutes.
Following these steps will also result in you cloning the Movidius App Zoo - a set of example programs for use with the NCS
Task Two: Installing OpenCV
Many of the examples in the Movidius App Zoo require OpenCV.
Installing OpenCV from source on the Raspberry Pi is time consuming, error prone and painful.
By installing OpenCV and it’s dependancies by using the steps below you will cut out MANY HOURS of frustration!
sudo apt-get install python-opencvsudo pip3 install opencv-python==3.3.0.10sudo apt-get install libjasper-devsudo apt-get install libqtgui4sudo apt-get install libqt4-test
This will install OpenCV version 3.3.0 in a few minutes, along with the dependancies you need for running some examples.
Task Three: Adding a Graph to your Raspberry Pi
As mentioned before, you use the Movidius SDK to convert your trained Deep Learning Model to a format that the NCS can understand. This is a job that is normally done on a development machine. I personally use an Ubuntu 16.04 instance running on VirtualBox. See the Movidius documentation for information about how to set this up.
To save you time, here is a pre-converted graph based on a Caffe Implementation of the Google MobileNet SSD detection network. This is a Deep Learning Model that is trained to recognize the following 20 objects:
aeroplane, bicycle, bird, boat, bottle, bus, car, cat, chair, cow, diningtable, dog, horse, motorbike, person, pottedplant, sheep, sofa, train, tvmonitor
Once you’ve downloaded the pre-converted graph file you can place it in the
~/workspace/ncappzoo/caffe/SSD_MobileNet/
directory on your Raspberry Pi. Remember to call this file ‘graph’ with no suffix (and unzip it if Dropbox has added a "zip" suffix)! Your graph is now ready for use by those Movidius App Zoo examples that use MobileNet SSD.
Task Four : Running the 'live-object-detector' Example from the Movidius App Zoo
The first example we’ll run is the live-object-detector. To run this, open a terminal on your Raspian Desktop.
cd ~/workspace/ncappzoo/apps/live-object-detectorpython3 live-object-detector.py
This should result in something like this:
Apologies for the bad image quality, but I think you'll agree that this was pretty fast for a Raspberry Pi! Try placing different objects (people, cars, chairs, sofas, bottles) in frame to see what happens.
The code for this example is pretty straightforward and well documented. Don’t neglect the utils sub-directory, which contains code for both deserializing the output from the Deep Learning model and annotating the video stream.
Note also that you cannot just switch out the MobileNet SSD graph with another type of Deep Learning model, as one cannot guarantee that all models deliver the same output structure.
Task Five : Running the 'security-cam' Example from the Movidius App Zoo
The next example is more or less exactly the same, but only looks for people in the video, and also creates a snapshot if a person is detected.
From a new terminal:
cd ~/workspace/ncappzoo/apps/security-campython3 security-cam.py
And here is an example video:
This code is ignoring all detected labels apart from “person”. Once you are finished testing this out, go to the captures sub-directory and see all the snapshots (be careful not to fill up your SD card playing with this one)!
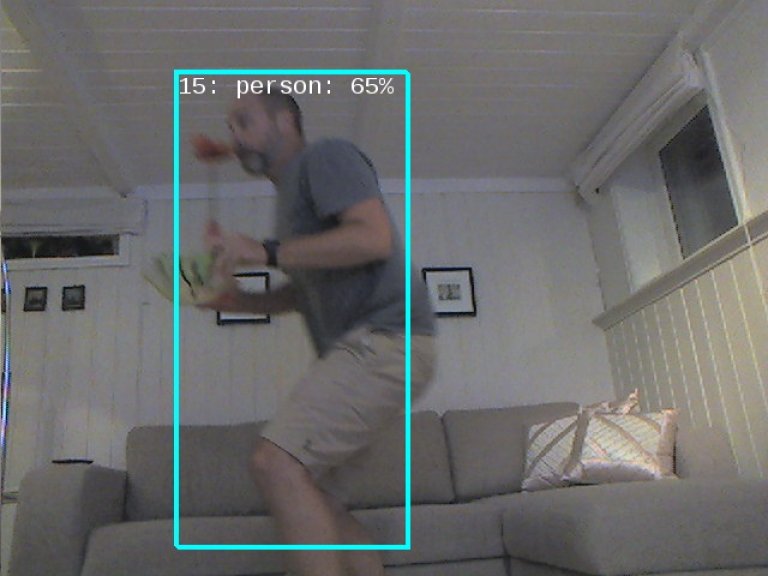
If I added email alerts and some file housekeeping to this example code then I would quickly have a candidate for replacing my AWS powered Smart Security Camera, which could save me 100-200 NOK a month!
Image processing at the Edge FTW!
Movidius NCS Performance
The Movidius NCS has one job in both the above examples - namely to find any occurrences of 20 predefined objects in each frame from the video stream, using inference based on the pre-trained Deep Learning model.
All other aspects of the examples (the video I/O, image annotation and resulting video display) are all handled by the Raspberry Pi.
In both the above use cases the Movidius NCS managed to process each frame in around 80 milliseconds. The would indicate that the speed of the real time annotated video is limited by the Pi itself and not the NCS.
Concluding Thoughts
This blog entry focused on getting you quickly up and running with the Movidius NCS, and therefore omitted some very important information. For example:
- We didn’t look into the code, and especially how the API SDK is used at Run Time. Luckily the examples we’ve run from the Movidius App Zoo are pretty self explanatory.
- We didn’t look into how the graph files can be created from the Tools SDK.
- We didn’t look into using different types of Deep Learning models. Note that different models may require different hyperparameters (i.e. image size) and will probably return output in different formats.
- We didn’t look into creating our own Deep Learning models. This is a whole other blog series!
In coming blog entries I’ll show how to replace the USB Camera with a Raspberry Pi Camera, and also look into using the Movidius with the Raspberry Pi Zero. If you have any comments or questions then feel free to post them below. You can also find me on twitter under the handle @markawest.
Finally I'd like to list some of the online resources that helped me get started with the Movidius NCS:
